


Science DIY Activities You Can Do at Home With Your 5-Year-Old
They poke, pour, mix, stack, drop, shake, and inspect everything around them. Sometimes it looks like play. Sometimes it looks like making a mess. Most of the time, it is both. What adults often see as random experimentation is actually a child gathering information about how the world works.
The exciting part is that science at this age does not need to look like school. What matters most is helping your child slow down and notice. Which object sank first? Why did the shadow change shape? What happened to the ice? Did the seed look different today than it did yesterday?
These simple observations build important skills that go far beyond science. Children learn to focus, compare, predict, solve problems, describe what they see, and develop confidence in their own thinking.
The National Association for the Education of Young Children (NAEYC) highlights the importance of hands-on experiences, conversation, and problem-solving in early science learning. The good news for parents? That learning often starts with the simplest question of all: "What happens if we try this?"
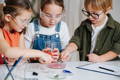
What Makes a Science Activity Montessori-Aligned?
A science activity becomes Montessori-aligned when the child is actively exploring instead of being taught step by step. The focus is on observing, testing, comparing, and discovering rather than memorising facts or getting the "right" answer.
That might sound fancy, but in practice it is surprisingly simple.
Montessori science uses real materials, hands-on exploration, and everyday experiences. The parents' role is to prepare the activity and then step back.
For example, when water disappears from a tray, there is no need to say, "This is evaporation." Try asking, "The water was here this morning. Where do you think it went?"
When an object floats, avoid turning it into a mini science lecture. A simple, "This one stayed on top. This one went down. Let's sort them," keeps the focus on observation.
Montessori science also encourages repetition. Children often want to test the same idea again and again. That is not wasted time. It is how they build understanding, confidence, and curiosity about the world around them.
How to Set Up Science at Home Without Chaos
To set up science at home, you do not need much. A tray, a few materials, and a towel nearby are often enough. The goal is to make it easy for your child to explore.
Use a Tray
A tray keeps everything in one place. It gives the activity a clear beginning and end and helps prevent materials from spreading across the room.
Keep It Simple
You do not need lots of supplies. A few carefully chosen items work best. A bowl of water, a spoon, and a handful of objects can keep a 5-year-old busy for quite a while.
Expect a Little Mess
Science can be messy. That is part of the fun. Keep a cloth, sponge, or towel nearby so small spills are easy to handle.
Let Your Child Clean Up
Do not rush in and do it yourself. Invite your child to wipe the tray, dry the bowl, or return materials to their place. In Montessori, cleanup is part of the learning.
Ask More, Explain Less
Children learn a lot from noticing things for themselves. Before explaining what happened, try asking:
- What do you notice?
- What changed?
- What do you think will happen next?
- Do you want to try again?
- How could we test that?
According to the CDC, preschoolers benefit from helping with simple chores and learning through everyday routines. Science activities can support both while giving children plenty of opportunities to explore, experiment, and discover.
15 Montessori-Inspired Science DIY Activities for 5-Year-Olds
We outline 15 DIY activities for your 5-year-old with a touch of Montessori and a whole lot of science in them.
Activity 1: Sink or Float Sorting Tray
Materials:
- bowl of water
- spoon
- cork, leaf, sponge, stone, plastic lid, wooden block
- towel
- two small labels or bowls: “sink” and “float”
Children love this activity because the results are immediate. Some objects stay on top. Others disappear straight to the bottom.
Fill a bowl with water and place a few objects beside it. Before your child drops each item into the water, ask, "What do you think will happen?"
Then let them test it.
As the objects are tested, sort them into two groups: things that sink and things that float. You might be surprised by some of your child's predictions. This activity helps children practise observing, comparing, and sorting. It also introduces the idea that we can make a guess, test it, and see what happens.
Safety note: Stay with your child during water play and empty the bowl when you finish. Even small amounts of water require supervision.
Activity 2: Ice Melting Investigation
Materials:
- Ice cubes
- Small bowls
- Warm water
- Cold water
- Spoon or dropper
- Towel
This is a great activity for children who love asking, "What happens if...?"
Place an ice cube into each bowl. Add warm water to one bowl, cold water to another, and leave the third ice cube on its own. Then sit back and watch. Encourage your child to check the ice cubes every few minutes. Which one is changing the fastest? Which one is taking the longest to melt?
The activity introduces simple ideas about temperature and change without needing a big explanation. Your child can see the results for themselves.
Try asking: "Which ice cube changed first?" or "What do you notice now?"
Activity 3: Color Mixing With Water
Materials:
- Three clear cups
- Water
- Food colouring
- Spoon
- Dropper or small spoon
- Towel
This is one of those activities that never seems to get old.
Fill two cups with water and add a different food colouring to each. Leave the third cup empty. Show your child how to move a little water from each cup into the empty one using a dropper or spoon, then let them take over.
There's no need to rush. They will probably want to try different amounts and see what happens each time. Ask simple questions like, "What colour did you make?" or "What do you think will happen if you add a bit more blue?"
It is a fun way to explore colour mixing while practising careful pouring and building confidence through trial and error.
Safety note: Food colouring can stain, so cover the table and use only a few drops.
Activity 4: Walking Water With Paper Towels
Materials:
- Three clear cups
- Water
- Food colouring
- Paper towels
This activity feels a bit like magic, even though it's just water doing what it naturally does.
Fill two cups with water and add a different food colouring to each. Leave the third cup empty and place it between them. Fold two paper towels into long strips. Put one end of each strip into a cup of coloured water and the other end into the empty cup.
Then wait and watch. The water will slowly travel along the paper towels and into the empty cup. Ask your child, "What do you notice now?" or "Where do you think the water is going?"
Activity 5: Magnet Hunt Around the House
Materials:
- Large fridge magnet or child-safe magnet
- Tray
- Spoon, coin, paperclip, wooden block, fabric, plastic lid, and rubber band
Place the objects on a tray and let your child test them one by one. Put anything the magnet picks up in one group and everything else in another.
Try asking, “Which one do you think will stick?” Then let your child check. They can repeat the activity with other safe objects from around the house.
This is a simple way to explore magnets while practising sorting and making predictions.
Safety note: Use one large, intact magnet. Never use small or loose magnets that could be swallowed.
Activity 6: Shadow Shapes
Materials:
- Flashlight
- Wall or white paper
- Toys or household objects
- Your hands
Turn off the lights and turn on a flashlight on a toy or even your hands. Watch the shadow appear on the wall. Then move the object closer to the light and farther away to see how the shadow changes.
Ask simple questions like, "What happened to the shadow?" or "Can you make it bigger?" You can also see if your child can make the shadow disappear.
The observation and curiosity are what make this activity a well-spent time with your kid.
Activity 7: Mirror Reflection Tray
Materials:
- Small unbreakable mirror
- Leaves, blocks, fruit, a spoon, a toy animal, or paper shapes
Place the mirror on a tray. Add a few objects from around the house and let your child move them, turn them around, and look at their reflections.
Ask simple questions like, "What do you see?" or "Which one looks different in the mirror?" Give them time to explore before saying anything else.
This activity is very calm and quiet, and that’s why most parents love it.
Safety note: Use a child-safe, unbreakable mirror.
Activity 8: Lemon and Baking Soda Fizz
Materials:
- Lemon juice
- Baking soda
- Tray
- Small bowl
- Spoon
- Dropper or small cup
This activity gets a big "Wow!" Start with a spoonful of baking soda in a small bowl. Then let your child slowly add lemon juice using a dropper or small cup. Watch the bubbles appear and let them enjoy the fizz.
Ask, "What happened?" or "Do you think it will fizz again if we add more lemon juice?" Most children won't mind repeating this one a few times.
Safety note: Stay with your child during the activity. Keep the mixture away from eyes and mouths.
Activity 9: Plant Drinking Experiment
Materials:
- Celery stalk or white flower
- Clear cup
- Water
- Food colouring
Prepare your patience here. Fill a cup with water and add a few drops of food colouring. Place the celery stalk or white flower in the cup and leave it for a few hours or overnight. Then check back together to see what has changed.
Ask, "Can you see where the colour went?" or "Which part changed first?" Your child may want to look again later to see if anything else has happened.
Activity 10: Seed Sprouting Jar
Materials:
- Dry beans or lentils
- Clear jar
- Paper towel or cotton
- Water
Some science activities happen in minutes. This one changes a little every day.
Place a damp paper towel inside a clear jar. Tuck a few beans between the towel and the glass so they're easy to see. Keep the paper towel damp and check on them together each day.
Ask, "What changed since yesterday?" or "Can you see any tiny roots yet?" Watching the first sprout appear is often the best part.
Activity 11: Homemade Rain Cloud
Materials:
- Clear glass or jar
- Water
- Shaving foam or whipped soap foam
- Food colouring
- Dropper or spoon
Fill a jar with water and add a layer of foam on top. Then let your child slowly drip coloured water onto the foam. Keep watching until the colour starts to fall through the foam like rain.
Ask, "What do you think will happen next?" or "Can you see the rain starting?"
Safety note: Stay with your child throughout the activity. Use it only if your child understands the foam is not for eating, and keep it away from younger siblings
Activity 12: Build a Simple Ramp
Materials:
- Cardboard
- Stack of books
- Small toy car, ball, or cylinder
- Measuring tape or string
Grab a piece of cardboard and lean it against a stack of books to make a ramp. Roll a toy car or ball down it a few times. Then make the ramp a little higher and see what happens.
Does it go faster? Does it travel farther? If your child wants to find out, measure the distance with a tape measure or a piece of string.
This is a fun way to explore how ramps, gravity, and movement work. Most children will want to change the height again and again just to see if they get a different result.
Activity 13: Sound Matching With Household Containers
Materials:
- Small containers with lids
- Rice, pasta, beans, coins, or cotton balls
- Tape
Fill two containers with rice, two with pasta, two with beans, and so on. Seal the lids with tape, then mix them up.
Now the fun begins. Shake one container and see if your child can find the one that sounds the same. They'll probably want to check their answer more than once.
It's a simple game that gets children listening closely and noticing that different materials make different sounds.
Safety note: Tape the lids shut before you start. If younger siblings are nearby, avoid using small items that could become a choking hazard.
Activity 14: Texture Sorting Sensory Box
Materials:
- Tray or small box
- Fabric scrap, sponge, smooth stone, pinecone, cotton ball, wooden spoon, and foil
- Optional labels: smooth, rough, soft, hard
If your child enjoys sensory play, this is an easy activity to set up with things you already have at home. You can also find more sensory play ideas in our dedicated guide.
Place the objects on a tray and let your child touch each one. Then sort them into groups like soft, rough, smooth, or hard.
Ask simple questions like, "Which one feels the softest?" or "Can you find another rough one?" There is no single right answer. The important part is exploring and comparing.
Activity 15: Evaporation Watch
Materials:
- Two small plates or trays
- Water
- Marker or tape
- Sunny window and a shaded spot
Pour a little water onto each plate. Place one by a sunny window and the other somewhere shady. Mark the water level with tape or take a quick photo, then come back later to compare them.
Ask, "Which plate dried first?" or "Where did the water go?" Your child might be surprised that it disappeared without anyone touching it.
It doesn't look like much at first, but it's a great way to see how heat changes water. Sometimes the simplest activities are the ones children remember most.
Activity 16: Oil and Water Observation Jar
Materials:
- Clear jar with lid
- Water
- Small amount of vegetable oil
- Optional food colouring
Fill a jar about halfway with water, then add a little oil. If you like, add a drop or two of food colouring. Put the lid on tightly and let your child give it a gentle shake.
Watch what happens next. At first, everything mixes together. Then, little by little, the oil floats back to the top.
Ask, "Did you notice what happened?" or "Do you think they'll stay mixed?" It's a simple way to see that some liquids just don't mix.
Safety note: Keep the lid tightly closed throughout the activity.
Activity 17: Paper Bridge Challenge
Materials:
- Paper
- Two cups
- Coins or small blocks
Place two cups a little apart and lay a sheet of paper across them. Now add coins or small blocks, one at a time, until the paper bends.
Next, fold the paper like an accordion and try again. See how many coins it can hold this time.
Ask, "What changed?" or "How could we make it even stronger?" Then let your child come up with their own ideas and test them.
This activity shows that trying something a different way can change the result.
How to Make These Activities More Montessori-Aligned
To make these activities more Montessori-aligned, you need to change the approach. A few small changes can help your child stay curious and explore more independently.
- Keep the setup simple. Place the materials on a tray and show one slow movement. Then let your child take over.
- Talk less. Give your child time to watch, touch, and figure things out before explaining what is happening.
- Follow their lead. If they want to pour water for 20 minutes or test the same object again and again, that's perfectly fine. Repetition is how children learn.
- Use real words naturally. Say words like float, melt, sprout, shadow, rough, or smooth as you play. There's no need to turn it into a quiz.
- Make cleanup part of the activity. Wiping the tray, drying the bowl, and putting everything away are all part of learning.
- Don't look for the "right" answer. Sometimes an activity won't go as planned, and that's okay. Ask, "What do you think happened?" and try again together.
Safety Notes for Science Activities at Home
A little preparation makes these activities much safer and more enjoyable for everyone.
- Stay with your child from start to finish.
- Use only a little water and empty bowls or trays when you're done. The American Academy of Pediatrics says young children should never be left alone near water, even if it's shallow.
- If you have younger children at home, keep small objects out of reach.
- Use only large, child-safe magnets. Never use loose magnet pieces.
- Plastic bowls and jars are usually a better choice than glass.
- These activities are for exploring, not eating. Unless you've planned a food activity, remind your child not to taste the materials.
- Lemon juice, vinegar, baking soda, soap, and food colouring can irritate eyes and skin, so wash your hands when you're finished.
- If your child starts throwing things or putting non-food items in their mouth, stop the activity and try again another day.
- If you're using scissors, make sure they're child-safe and stay close while your child uses them.
The U.S. Consumer Product Safety Commission also recommends keeping small parts away from children under 3 because they can be a choking hazard.
You Don't Need a Science Kit
Most of the activities in this guide use things you probably already have at home. A few cups, a spoon, water, paper, cardboard, and some kitchen ingredients are often all you need.
But a few simple Montessori materials can help you keep the exploration going. Montessori stacking cups are great for pouring and water play, while wooden blocks work well for ramps, bridges, sorting, and shadow activities. You can also explore more sensory play ideas, Montessori sensory toys, and open-ended toys that encourage children to investigate, build, and experiment in their own way.
The best part?
Curiosity starts with simple materials, a little time, and the freedom to explore.
Conclusion
Every day is full of opportunities to explore science together. A melting ice cube, a growing seed, a changing shadow, or a bowl of water can teach your child something new without feeling like a lesson.
There's no rush to find the right answer. Let your child ask questions, make guesses, and try things more than once. Those small moments are where real learning happens.
The more your child explores with their hands, the more confident they'll become. Over time, they'll start noticing patterns, asking bigger questions, and becoming more curious about the world around them.
When a child can touch, test, repeat, and notice what changed, science becomes part of everyday life.
FAQ
What science activities can I do at home with a 5-year-old?
Some of the best science activities use things you already have at home. Try sink or float, ice melting, colour mixing, seed sprouting, shadow play, magnet sorting, building ramps, texture sorting, or watching water evaporate.
How do I teach science to a 5-year-old the Montessori way?
Keep it simple. Use real materials, set everything up on a tray, and let your child explore first. Ask questions, give them time to repeat the activity, and avoid explaining too much.
Do I need to buy a science kit?
No. Most science activities for 5-year-olds only need everyday items like water, cups, paper towels, spoons, cardboard, jars, leaves, or kitchen ingredients.
Are science experiments safe for 5-year-olds?
Yes, as long as they are age-appropriate and supervised. Use shallow water, avoid small loose parts, keep magnets large and intact, and choose child-safe materials.
Which Montessori science activities support sensory learning?
Texture sorting, sound matching, sink or float, ice melting, plant observation, and water transfer are all great ways to support sen.

Free Delivery
Over $80

Easy Returns
No questions asked

Unbeatable Warranty
1-year ++ warranty
 Secure CheckoutWorld’s most secure payment method