


Teaching Children to Use Scissors – Complete Development Guide
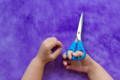
There’s something magical about the first time a child cuts a piece of paper all by themselves. That proud smile and the concentrated expression are nothing short of wonderful. For many parents, however, the idea of handing their child a pair of scissors sparks anxiety.
What if they hurt themselves? What if they cut something they shouldn’t?
The truth is, scissors skills go far beyond art projects. Learning to cut with scissors helps children build coordination, hand strength, problem-solving skills, and even the foundations for writing.
And there’s no better approach to teaching children scissors and cutting skills than the Montessori method.

Why Scissor Cutting Skills Matter for Development
Cutting with scissors might seem like just another craft-time thing, but it’s actually a big deal for kids. Sure, giving scissors to a toddler sounds like a recipe for chaos. We get it. But in the Montessori, it’s more about growth than mess.
Yeah, teaching little hands to snip can feel a bit scary. And while learning how to help young children use scissors can be daunting, it’s still important.
Cognitive Benefits
Cutting isn’t just fun, it’s brain training in disguise. When kids use scissors, both hands have to work together, but do different things. That’s called bilateral coordination, and it’s a fancy way of saying “teamwork for your hands.”
They’re also learning to plan moves before they make them, which helps with focus and decision-making. These skills all tie into visual-motor integration, basically, the magic behind things like writing neatly or solving puzzles without giving up.
That said, Montessori magnetic maze boards are great for the same reason. They’re like brain gyms, helping kids think ahead and figure stuff out one step at a time.

Physical Development Impact
Cutting may look simple, but it’s a full-on workout for little hands. Every snip builds up finger strength, hand control, and wrist stability, all the stuff they’ll need for tying shoes, buttoning shirts, and holding a pencil the right way.
Montessori activities like using tweezers, stringing beads, or moving tiny objects around are all in the same club. They’re not just cute. They’re building fine motor skills, which are very important for operating with scissors.
Academic Readiness Connection
Scissor skills are low-key academic training. No worksheets, no lectures, just real learning through action. Kids build patience, master multi-step instructions, and lock in their focus. All while turning plain old paper into dragons, rockets, or whatever their imagination dreams up.
They're also sharpening spatial awareness, figuring out where to cut, how to move their hands, and how pieces fit together.
And that skill? It’s huge. It lays the foundation for reading, math, writing, and everything else that comes next in school. Scissors are prep for the real world.

Prerequisite Skills Assessment
Essential Pre-Scissor Skills (Must Master Before Scissors)
Before children can safely use scissors, they need to master a set of fine motor skills that lay the groundwork for cutting.
Here’s what to look for and practice first:
Bilateral Coordination Activities
- Paper tearing in straight lines using both hands.
- Playdough manipulation: rolling, squeezing, pulling apart.
- Large bead threading (like the Montessori rainbow beads).
- Book handling: holding the book steady while flipping pages.

Grasp and Release Mastery
- Clothespins: opening and closing with one hand.
- Tongs and tweezers: transferring small items like pom-poms.
- Spray bottles: strengthening the hand through repeated squeezing.
- Using hole punchers or staplers: boosting controlled force and release.
Hand Strength Indicators
- Squeeze toys: using rubber or silicone toys repeatedly.
- Interlocking toys: pulling apart building pieces with resistance.
- Playdough pressing: pushing and shaping tough dough.
- Food prep tools: using garlic presses or small mashers.
Readiness Assessment Checklist
- Uses both hands simultaneously for different tasks.
- Shows consistent hand dominance.
- Can isolate the index finger (points without other fingers moving).
- Controls squeeze-and-release movements with tools like tongs or clips.
A child must also be able to understand and follow safety expectations:
- Follows 2 to 3-step directions reliably.
- Shows interest in cutting activities.
- Can focus on fine motor tasks for 10+ minutes.
- Understands and responds to commands like “stop” and “wait”.
- Demonstrates safety awareness with other tools.
- 18–24 months: Still in the pre-cutting phase, focusing on Montessori skill-building toys.
- 2–2.5 years: May show curiosity but likely not physically or cognitively ready.
- 2.5–3 years: Earliest stage for introducing plastic or self-opening scissors.
- 3–4 years: Ideal window for learning basic scissor control and practicing lines.
- 4+ years: Most children can begin cutting out basic shapes with confidence.

Progressive Skill Building Before Scissors
Stage 1: Foundation Building (Ages 18 Months – 2.5 Years)
- Popping bubble wrap with both hands.
- Pulling apart and pressing together Velcro strips.
- Threading large wooden or plastic beads.
- Tearing and gluing paper to make simple chains.
- Budget ($50–150): Firm mattress on the floor with a simple wooden frame, maybe even a DIY one that meets all the safety considerations and setup requirements.
- Mid-range ($200–500): Purpose-built Montessori floor beds with rounded edges and integrated safety features made from untreated wood.
- Premium ($500–1,000+): Custom pieces with heirloom quality construction and features like rail guards or under-bed storage.
- Full room baby-proofing.
- Outlet covers, anchored furniture, and padded edges.
- Monitoring systems, if needed, during early use.
- Using a large water dropper or syringe to transfer liquid
- Pressing garlic through a child-safe garlic press filled with playdough
- Moving pompoms from one container to another with large tweezers
- Attaching clips or clothespins to cardboard edges
Stage 2: Refined Control (Ages 2.5 – 3 Years)
- Clip smaller clothespins onto containers.
- Use kitchen tongs to move dry pasta between bowls.
- Eyedropper activities with colored water.
- Tearing paper into basic shapes.
- Turning pages independently in a book.
- Holding puzzle pieces while placing them.
- Doing crafts like placing and pressing stickers.
- Use a hole puncher on cardstock or paper.
Safety Training Protocol
Scissors may seem small, but they demand real responsibility. Before any cutting begins, children need clear safety guidance and consistent practice with rules.
Safety Rules Introduction (Before First Scissor Use)
- Scissors cut only paper and approved materials: No hair, no clothing, no furniture, no guessing.
- Walking feet when carrying scissors: Tips must point down, and the child must walk, not run, when holding scissors.
- Scissors stay at the table: Cutting happens only in designated workspaces.
- Ask before cutting: Always check with an adult before starting a cutting activity.
- Act them out dramatically because kids remember exaggerated examples.
- Practice “walking with scissors” using a closed pair.
- Role-play unsafe choices (cutting a toy) and safe corrections.
- Post visual reminders near the cutting station to reinforce expectations.
Graduated Safety Exposure
- A child watches an adult model cutting while narrating each step.
- They may help hold the paper, but not the scissors, yet.
- Practice holding closed scissors safely.
- Recite safety rules before each session to reinforce understanding.
- Use hand-over-hand assistance while the child learns to open and close the blades.
- Adults still control most of the cutting motion.
- Focus is on posture, paper placement, and following directions.
- Celebrate each safe, successful snip. This stage builds trust.

Age-Appropriate Scissor Introduction
Choosing the Right Scissors
- A spring-loaded or self-opening mechanism to help children master the open-close motion without muscle fatigue.
- Blunt tips for safety, but with sharp enough blades to cleanly cut paper.
- Large bottom loop for two or three fingers, supporting grip strength.
- Small top loop for thumb placement, critical for developing control.
- High-quality blades (even on plastic scissors) that don't just fold or shred paper.

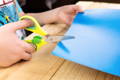
Proper Grip Teaching Method
- Thumb in the small top loop, always “facing the sky.”
- Index and middle fingers in the larger bottom loop to support the tool.
- Wrist facing forward, not twisted sideways.
- Elbows on the table for stability while cutting.
- Draw a smiley face on the child’s thumbnail. If they can see it, their thumb are in the right spot.
- Wrap bright tape around the thumb hole to remind them where to insert their thumb.
- Use mirrors so they can watch their grip and self-correct.
Progressive Cutting Activities
Once children learn to use scissors, their fine motor development accelerates, but that progress depends on the steps taken before and during scissor practice.
Each stage builds specific skills like control, precision, and visual tracking. Rushing through this phase often leads to frustration or bad habits. Go slow, celebrate progress, and adjust based on your child’s readiness.
Stage 1: Snipping Practice (First 2–4 Weeks)
- Cardstock strips – about an inch wide; stiff enough to stay straight while snipping.
- Paper straws – easy to hold and cut into small pieces.
- Playdough snakes – soft and resistant; gives sensory feedback.
- Ribbons – provide variety in texture and slight resistance.
- Controlled single snips
- Open-close motion development
- Grip stabilization and wrist control

Stage 2: Line Following (Weeks 4–8)
Once single snipping is solid, children can begin cutting along lines. This requires coordination between both hands and visual tracking.
How to structure line work:
- Start with thick straight lines - ½-inch wide lines are forgiving and easy to follow.
- Progress to thinner lines, then gentle curves.
- Introduce zigzags, and eventually spirals to practice direction changes.
- Emphasize moving the paper, not the scissors, to stay on track.
- Teach “small bites”, short snips to control accuracy.
- Celebrate effort, not perfection. Approximations are fine!

Stage 3: Shape Cutting (Weeks 8–16)
- Large circles – continuous curves help reinforce smooth motion.
- Squares and rectangles – practice turning corners.
- Triangles – introduce cutting to points.
- Complex shapes – combining curves and angles build advanced coordination.
Common Challenges
Grip Problems and Solutions
- Use verbal cues like “Thumbs up to the sky.”
- Place a smiley face sticker on their thumbnail so they can see it while cutting.
- Have them practice the grip using a mirror for self-correction.
Children might use their whole hand to hold the paper instead of a precision grip, making control harder.
Solution:
- Demonstrate a “pinch grip” using just the thumb and index finger.
- Use small paper pieces to reduce the temptation of a full-hand grip.
- Try non-cutting fine motor tasks like paper folding or puzzle work to build finger dexterity.
Coordination Difficulties
- Start by moving the paper for them while they cut.
- Gradually shift to hand-over-hand guidance.
- Practice short-cutting lines to avoid overwhelming them.
- Switch temporarily to self-opening scissors (spring-loaded).
- Incorporate squeeze toys, tweezers, and eyedroppers into daily play.
- Be patient, this coordination can take several months to solidify.
Safety Concerns
- Immediately and calmly remove the scissors.
- Reinforce the rule: “Scissors only cut paper at the table.”
- Review and practice the safety rules before the next session.
- Revert to prerequisite activities if the behavior continues.

Integrating Cutting with Learning Activities
Academic Integration
- Letter Recognition: Cut letters out of magazines and match them to alphabet cards.
- Shape Learning: Create shape collages with circles, squares, and triangles.
- Counting Practice: Cut out pictures of objects (like apples or cars) and count as you go.
- Color Sorting: Cut colored paper into strips or shapes, then sort by hue.
Creative Applications
- Collage making: Provide glue, paper scraps, and freedom. Let your child design.
- Gift wrapping: Involve them in wrapping presents and activities like cutting paper, ribbon, tape, and paper.
- Recipe prep: Use clean, child-safe scissors to snip herbs or slice soft fruit.
- Gardening: Snip dead leaves or trim herbs (with supervision), practicing care and control.
When to Seek Professional Help
- Persistent bilateral coordination issues: If your child consistently struggles to use both hands together (for example, holding paper with one hand while cutting with the other), it may signal a developmental delay.
- Noticeable hand weakness: If squeezing scissors or similar tools causes fatigue or frustration, or if tasks like coloring, grasping toys, or opening containers are unusually difficult.
- Avoidance or discomfort with tool use: Some children avoid scissors or show distress when asked to use them. This could point to sensory processing issues or fine motor delays.
- Difficulty following instructions or focusing: If your child can’t stick with cutting tasks or follow basic directions despite age-appropriate expectations, it may indicate attention challenges.
Conclusion
Scissor skills are more than craft time; they build motor control, confidence, and independence. It might seem risky, but with the right tools and a step-by-step approach, your child can learn safely.
Start with the basics, set clear rules, and take it one step at a time. With patience and trust, you’re not just teaching cutting, you’re building real-life skills.
Ready to go? Check their readiness, grab the scissors, and let the learning begin.

Free Delivery
Over $80

Easy Returns
No questions asked

Unbeatable Warranty
1-year ++ warranty
 Secure CheckoutWorld’s most secure payment method