


Teaching Children to Use a Knife the Montessori Way
The first time a Montessori parent gives their toddler a real knife, it can feel like a wild move. In a world full of plastic forks and “safety scissors,” handing over a sharp tool might seem like a parenting no-no. But in Montessori? It’s actually a big step toward trust, independence, and teaching real-world skills from the start.
Montessori encourages real tools for real learning. Teaching knife skills to toddlers means letting go of fear and embracing safe, structured risk. Kids actually learn safety from the ground up.
So today, we’ll walk you through Montessori knife skills for kids, from knowing when your child is ready to choosing the right tools and building kitchen confidence step by step. We’ll also cover stuff like ‘’at what age can a child use a knife’’ and ‘’child safe knife introduction’’.
Comprehensive Readiness Assessment
Before you even think about handing your kid a knife, yes, even the butter-spreader kind, you’ve got to know if they’re truly ready. Montessori is all about how to teach your children safe knife use.
We look at the whole picture: are they strong enough, focused enough, and calm enough not to turn snack time into a sword fight?
Physical Development Prerequisites
A child’s hands and body must be ready to manage tools safely. Start by checking these key signs:
- Fine motor skills: Can they use a pincer grasp to pick up small items like Cheerios? Can they isolate their index finger to point?
- Bilateral coordination: Can they use both hands together like a little pro? Think about holding a cup steady while pouring juice, or keeping food still with one hand while tearing it with the other. Basically, teamwork, but with their own two hands.
- Wrist and core stability: Can they sit upright without slumping? Can they control their hand movements without flailing?
These indicators show whether their bodies are ready for chopping and basic knife skills.
Cognitive and Emotional Readiness
Knife work also requires brain power. A child should be able to:
- Follow simple instructions, like “Cut here” or “Hold it like this.”
- Hit the brakes when you say “Stop!” with no hesitation.
- Stay focused on the task without getting distracted by, well... literally anything else.
- Show they understand risk in everyday stuff, like not sprinting past the stove or climbing the counter like it’s Mount Everest.

Age-Based Development Expectations
Every kid grows at their own pace, but if you’re wondering when to break out the knives (the safe ones, don’t worry), check out Montessori's planes of development in this field:
- 18–24 months: Let them start with spreading. Use cream cheese on toast or a banana on crackers, and give them a butter knife or toddler spreader.
- 2–3 years: Time for a wavy chopper. They’ll love the up-and-down or rocking motion on soft stuff like cooked carrots or strawberries.
- 3–4 years: Bring in a kid-safe serrated knife so they can practice gentle sawing on firmer foods like cucumbers or apples.
- 4–6 years: Now we’re getting serious. With close supervision, they can try small, real knives and help with trickier prep.
The 7-Stage Montessori Knife Progression
Montessori knife work isn’t about handing over an apple and hoping for the best. It’s a step-by-step journey where each stage builds kids knife skills, better control, smarter safety habits, and growing confidence.
The idea is to match the challenge to where your child’s at, one slice at a time. This way, you’ll see some real children's knife progression.
Spreading Foundation (18–24 Months)
- What they’re building: Hand-eye coordination, a feel for gripping the knife, and those fine motor skills we love to see.
- Your job: Go slow, show them how it’s done, help with hand-over-hand guidance if needed, and yep, keep a close eye the whole time.

Pressing and Mashing (20–26 Months)
As your little chef gets stronger and more in control, it’s time to bring in tools like a mini potato masher or a chunky spreader. Now they’re learning how to press down and repeat the motion, big moves that lay the groundwork for actual chopping later on.
Try this with soft foods like bananas, cooked squash, or avocado. It’s squishy, satisfying, and builds real skills.
And hey, keep it real, this isn’t just playtime. Let them help with actual food prep. They’ll feel proud, and you’ll get an extra set of hands (even if slightly messy ones).
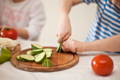
Wavy Chopper Introduction (24–30 Months)
This is the first real cutting tool: a wavy chopper knife with a large handle and a wavy edge. Its design supports safe, two-handed cutting using a rocking motion.
- Foods like cheese sticks, cooked carrots, or soft zucchini are ideal for practice.
- Emphasize safety. “Knives stay on the cutting board,” and “We cut food, not fingers.”
Serrated Training Knife (30–36 Months)
- Children practice slicing with more control.
- Begin guiding them to cut in straight lines and complete more precise tasks.
Small Metal Knife Introduction (3–4 Years)
Complex Food Preparation (4–5 Years)
- Choose the right knife for the job
- Organize their workspace
- Use knives in combination with other tools
Independent Mastery (5–6 Years)
- Follow simple recipes.
- Work with peers or younger siblings.
- Maintain and clean their tools.
Comprehensive Safety Protocol Development
When teaching Montessori knife skills to children, safety isn’t just about what kind of knife you hand over. It’s about the entire system. The space, the tools, the supervision, and the mindset. A solid safety foundation builds long-term confidence, not fear.
The Four-Pillar Safety Foundation
- Use a kid-height table and pop a non-slip mat under the cutting board so nothing skates around.
- Keep it chill - no loud music, toys, or pets zooming by.
- And yeah, keep a little first aid kit nearby. Better safe than scrambling.
- Give knives a proper home - safe, easy to reach, no rummaging.
- Show them how to check if a knife’s bent or dull before using it.
- And teach how to wash and dry carefully - blade first, always with focus.
- Hands-on: You're guiding their hands. Great for total beginners.
- Close by: Within arm’s reach, but they’ve got the lead.
- Nearby: You’re in the room, just keeping a soft eye on things.
- Independent: For older kids who’ve proven they can handle it safely.
- Tiny cuts? Stay cool, clean it up, slap on a bandage, and keep things calm.
- Big emotions? Acknowledge the feelings without turning them into a crisis. Talk it through, help them learn from it.
- Safety slip-ups? Stop the activity, go over the rules again, and figure out when it’s right to try again.

Age-Specific Safety Protocols
- Only use spreaders or butter knives.
- Constant adult hand contact during cutting.
- Work periods should be short, 5 minutes or less.
- Introduce a wavy chopper or plastic training knives.
- An adult must be within arm’s reach at all times.
- Repeat safety rules before every session.
- Begin limited real knife use with extreme care.
- Adults should maintain visual contact.
- Quizzing on rules helps reinforce understanding.
- Gradual shift to independence, especially for familiar tasks.
- Continue regular check-ins on technique and tool care.
- Encourage children to help teach younger peers; it deepens their own understanding.
Complete Environment Preparation Guide
Knife work in Montessori isn’t limited to the tool in hand. Actually, it’s about the entire environment being designed for focus, responsibility, and safe learning. If you want your child to develop Montessori kitchen skills with real independence, your setup matters as much as your supervision.
Physical Workspace Setup
- Child-height table and chair: The child’s feet should touch the floor or a footrest, creating body stability for better control.
- Sturdy seating: Avoid wobbly chairs. A stable, supportive seat boosts core engagement and prevents fatigue.
- Accessible storage: Keep knives and food-prep tools in low, reachable drawers or containers. Accessibility equals independence.
- A small basin or access to a child-height sink encourages cleanup as part of the full kitchen cycle.
- Keep towels or cloths nearby so they can clean up spills without asking.
- Non-slip mats under cutting boards and on the floor reduce accidents.
- Rounded edges on furniture and cutting boards reduce injury risk.
- Good lighting, preferably natural, but also consider a focused task light for cloudy days or early evenings.
- Clear sight lines because you should always be able to see your child from where you’re working or sitting.

Material Organization
Cutting board selection
- Use child-sized boards that are large enough to handle food but light enough to move independently.
- Wood or food-grade plastic works well, just make sure the surface is stable and easy to clean.
Food preparation materials
- Pre-cut foods to manageable sizes if needed, especially early on.
- Rotate options based on season, recipe, or skill level.
- Use appealing, fresh foods. A visually inviting task helps with engagement and focus.
Start simple with foods like bananas, cucumbers, steamed sweet potatoes, and work toward firmer, trickier foods. Encourage variety, but don’t rush the pace. When in doubt, observe your child: are they confident, curious, or overwhelmed?

Challenges
Even with the best setup and planning, you’re bound to hit a few bumps. That’s normal. Teaching toddler knife safety requires a blend of flexibility, consistency, and observation.
Here’s how to handle the most common hurdles.
Resistance and Fear Issues
The child is afraid to use a knife:
Fear usually comes from unfamiliarity or a prior negative experience. Reintroduce the activity at a simpler level, maybe with a spreader or soft foods like bananas.
Let your child watch you use a knife with calm, confident movements. Never force participation. Instead, build curiosity and comfort gradually.
The child is too aggressive with the knife:
Excitement or poor control might lead to stabbing or reckless movements. Step in quickly, calmly state the safety rule, and reset the tone.
You might say, “Knives are only for cutting food, not for waving.” Give them a break and try again later with a reminder about expectations.
Technical Skill Challenges
Struggling with cutting technique:
Common causes include starting with the wrong tool, moving too quickly, or not modeling clearly. Go back a stage. Offer slower demonstrations, and consider switching to a different food or tool.
Hand-over-hand guidance can help without taking over completely.
Inconsistent rule-following:
Sometimes a child knows the rules but doesn’t always apply them. Keep safety rules simple and repeat them consistently.
Visual cues or short reminders (like a small safety poster near the prep station) can help reinforce expectations.
Physical Development Delays
Not enough hand strength:
When it comes to toddler cutting skills development, before anything else, use playdough, stress balls, or clothespin games to strengthen hand muscles. Choose lighter knives or tools with thicker, ergonomic handles. Stay at one skill level longer before progressing.
Trouble with coordination:
Practice bilateral tasks like pouring, scooping, or stringing beads. If you continue to notice issues with your toddler's cutting skills development, consult with an occupational therapist for tailored strategies.
Integration with Broader Montessori Practices
Montessori is about connecting that task to a bigger picture of independence, purpose, and confidence. So, teaching knife skills is about building the whole child.
Practical Life Connections
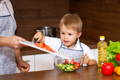
Knife work fits naturally into a larger framework of Montessori practical life skills. Once your child begins cutting, extend that skill into related activities:
- Food prep sequences: Invite them to wash produce, chop it, plate it, and serve it.
- Table setting: Show how to lay out placemats, utensils, and napkins.
- Cleanup routines: Involve them in wiping the table, rinsing dishes, and caring for tools.

Academic Integration
- Math: Cutting halves and quarters introduces fractions.
- Language: Describing food textures and recipe steps builds vocabulary.
- Science: Observing how heat changes food introduces basic chemistry.
- Culture: Preparing dishes from around the world can spark geography and history discussions.
Conclusion

Free Delivery
Over $80

Easy Returns
No questions asked

Unbeatable Warranty
1-year ++ warranty
 Secure CheckoutWorld’s most secure payment method